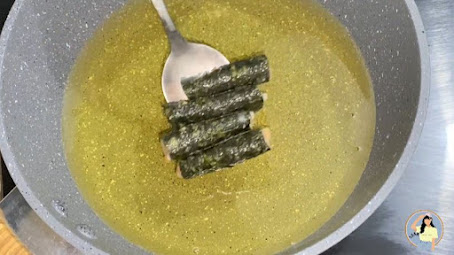
The recipe for Crispy Nori Chicken Rolls combines traditional Japanese ingredients and techniques with a modern twist. 🌿 Nori, a seaweed used in Japanese cuisine for centuries, wraps around ground meat, a common ingredient in various Asian dishes. 🍗 The frying method draws inspiration from tempura and other Japanese cooking techniques, showcasing a fusion of traditional elements with contemporary culinary creativity. 🍳 This recipe highlights how traditional ingredients like nori can be innovatively used in new and exciting ways. 🌟
NUTRITION FACTS (approximately per serving):
Calories: 180 kcal
Protein: 14g
Carbohydrates: 6g
Fat: 11g
Sodium: 390mg
Prep Time: 15 minutes
Cooking Time: 15 minutes
Total Time: 30 minutes
Servings: 4-6 servings
Please note that these values are approximate and can vary depending on the specific brands and quantities of ingredients you use. Additionally, the nutrition facts can change if you adjust the recipe or serving size. Be sure to check product labels and use a nutrition calculator for precise values, especially if you have specific dietary requirements or restrictions.
INGREDIENTS:
8 Nori sheets (cut into half)
¼ kilogram Ground chicken
1 piece Carrot (small, minced)
1 piece Onion (small, minced)
¼ teaspoon Salt
¼ teaspoon Pepper
½ teaspoon Garlic powder
½ tablespoon Oyster sauce
1 teaspoon Sesame oil
1 tablespoon Cornstarch
1 piece Egg
Oil for frying
Coating:
2 tablespoons Cornstarch
½ cup water
DIRECTIONS:
Step 1: Prepare the Ingredients
Mince the carrot and onion.
In a large mixing bowl, combine ground chicken, minced carrot, minced onion, salt, black pepper, garlic powder, oyster sauce, sesame oil, egg, and cornstarch.
Mix thoroughly until well combined.
Step 2: Taste Test
To check for seasoning, fry a small amount of the mixture in a pan.
Adjust seasoning if needed by adding more salt, pepper, or garlic powder.
Step 3: Shape and Roll
Transfer the chicken mixture into a piping bag or use a spoon to spread the mixture.
Lay a nori sheet flat and pipe or spoon a thin layer of the chicken mixture along the edge of the sheet.
Roll the nori sheet tightly, brushing the edge with water to seal it.
Repeat the process for the remaining mixture.
Step 4: Slice into Portions
Once all rolls are formed, cut each roll into 4 equal pieces, setting them aside on a plate.
Step 5: Prepare the Coating
In a separate bowl, mix water and cornstarch until fully combined to create a smooth coating.
Step 6: Frying
Heat oil in a deep pan over medium heat. The oil should be around 350°F (175°C).
Dip each nori-wrapped roll into the coating mixture, ensuring they are evenly coated.
Carefully place each piece in the hot oil and fry until golden brown and crispy, about 4-6 minutes.
Transfer to a paper towel-lined plate to drain excess oil.
TIPS:
For added flavor, you can sprinkle a bit of chili flakes or paprika into the chicken mixture.
Try using a mixture of ground pork and chicken for a richer taste.
If you don’t have a piping bag, use a ziplock bag with a corner cut off or simply spoon the mixture onto the nori sheet.
Ensure the oil is hot enough (but not too hot) to avoid burning the nori before the chicken is fully cooked. A thermometer can help you maintain the right temperature.
Don’t overcrowd the pan while frying; cook in batches to ensure even cooking and crispiness.
In the Refrigerator: Store leftovers in an airtight container in the fridge for up to 3 days. To reheat, place them in an oven or air fryer to maintain crispiness.
In the Freezer: Freeze cooked rolls on a baking sheet until solid, then transfer to a freezer-safe bag or container. They can be frozen for up to 2 months. Reheat from frozen in an oven or air fryer for best results.
To Avoid Sogginess: If you plan to store the rolls, avoid stacking them while they are still warm. Allow them to cool completely before storing to prevent moisture buildup, which can make them soggy.
Serve & Enjoy! 💖


Comments
Post a Comment